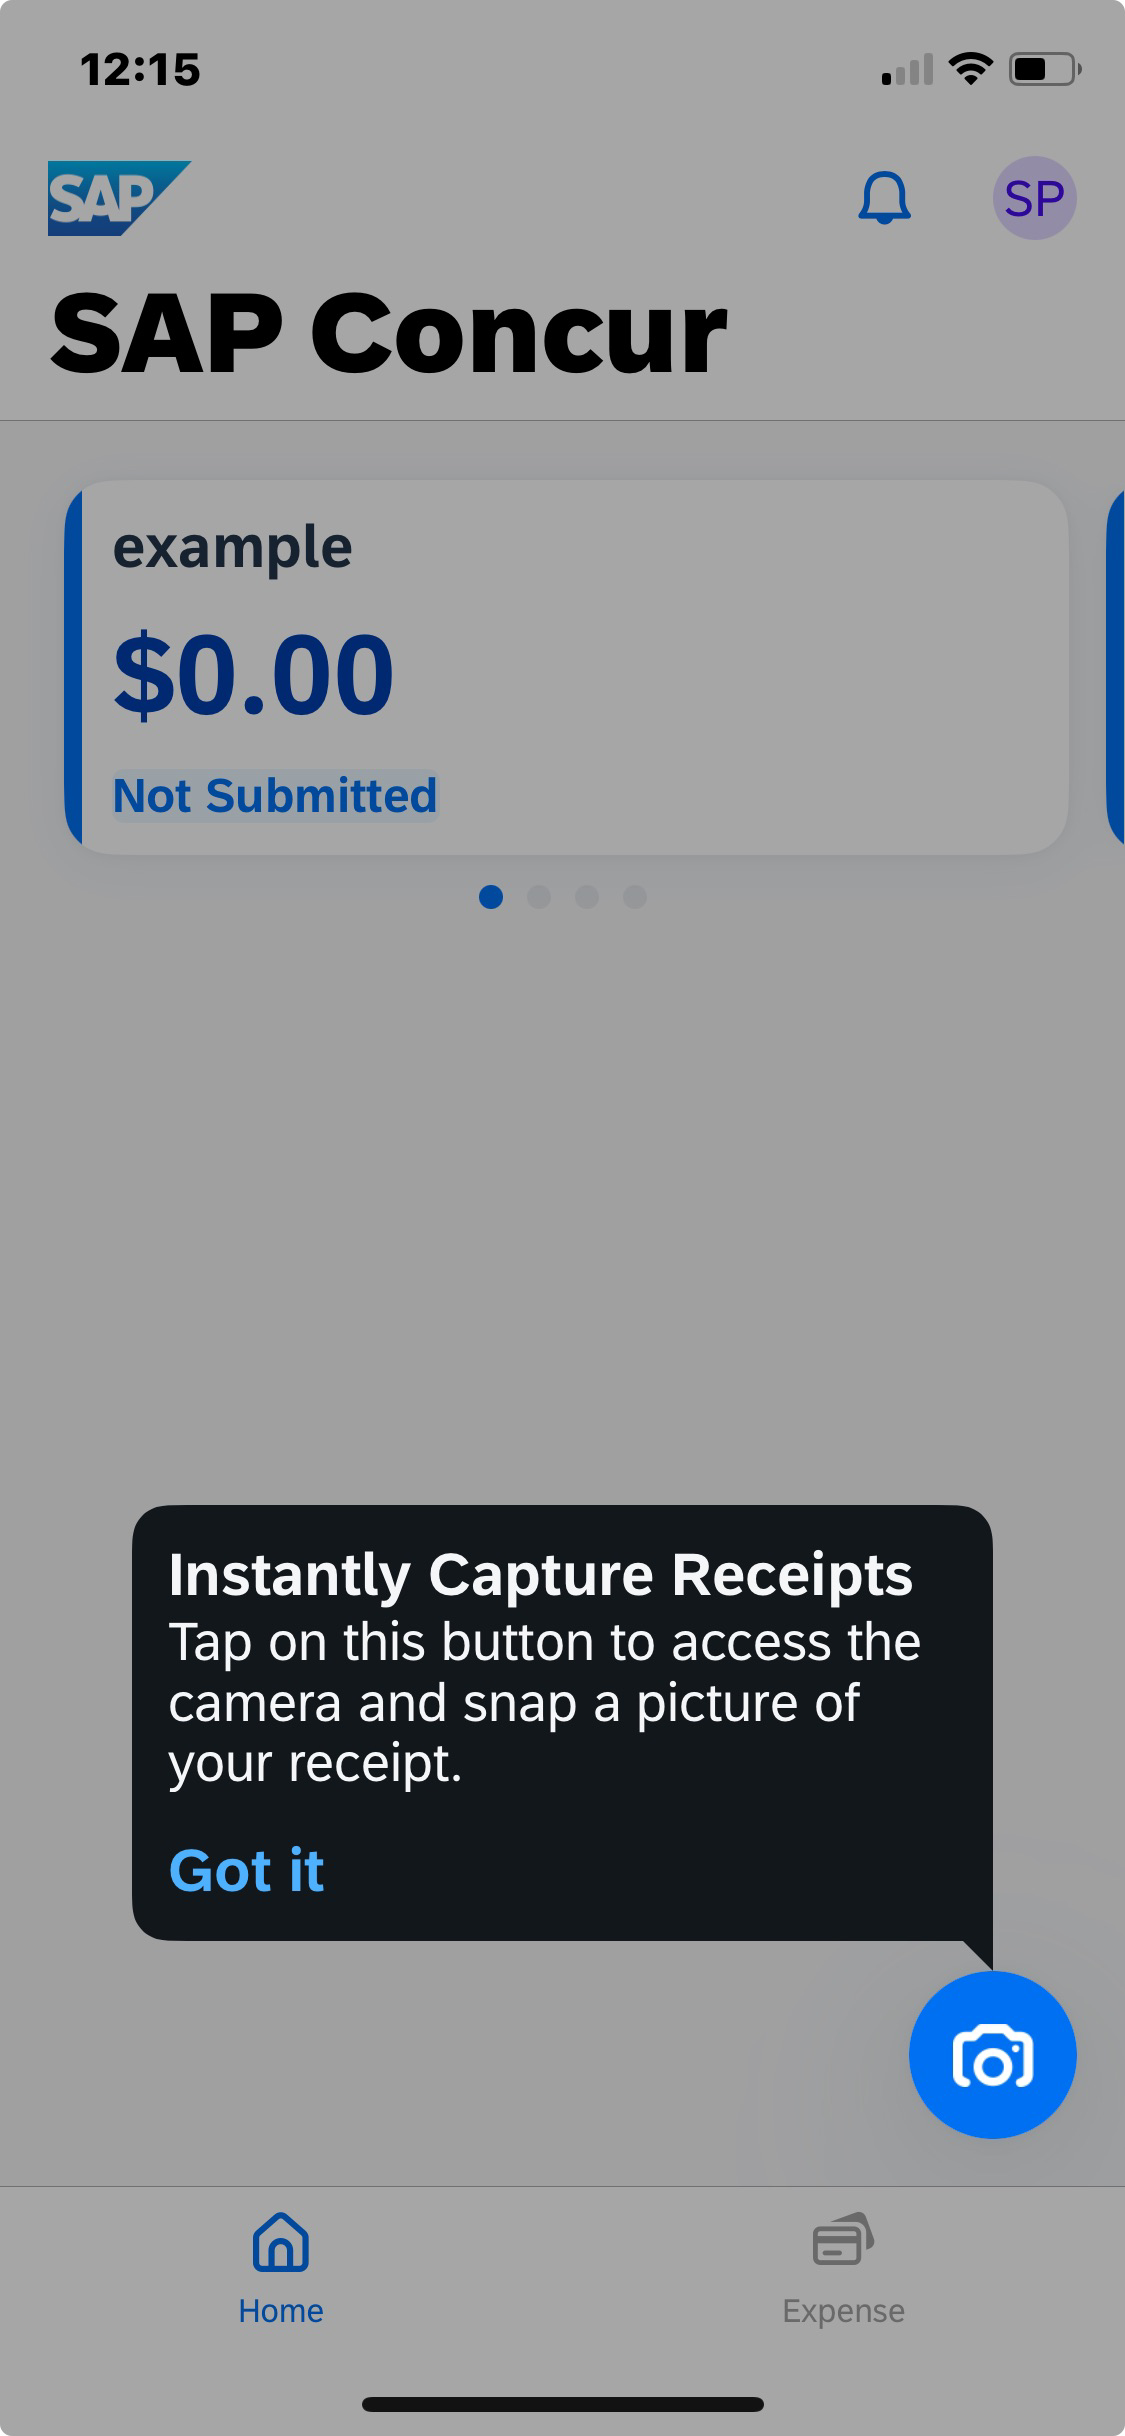
How to Use SAP Concur Expense
SAP Concur Expense is a platform that streamlines the process for peer reviewers to capture and submit expense reports for their visit/travel expenses. By utilizing SAP Concur, peer reviewers will no longer need to complete or submit HLC’s Travel Expense Reimbursement Form.
Reimbursements are made via direct deposit so that you can receive payment faster than paper check. All Concur users are required to submit bank account information.
Logging Into Concur for the First Time
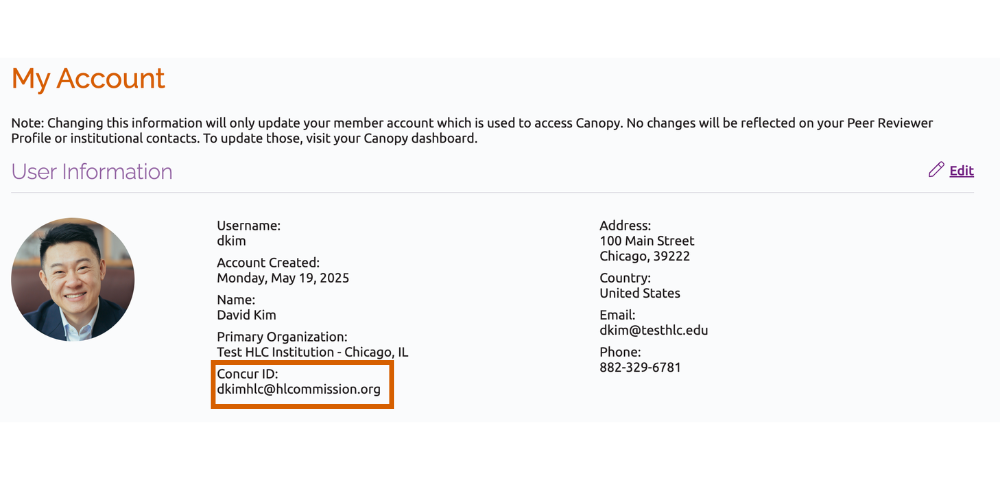
- Locate your unique Concur username in Canopy. This will likely contain your first initial, last name and [email protected]. Please note: this is not a real email. All communications from Concur will be sent to your preferred email address (can be updated in Canopy).
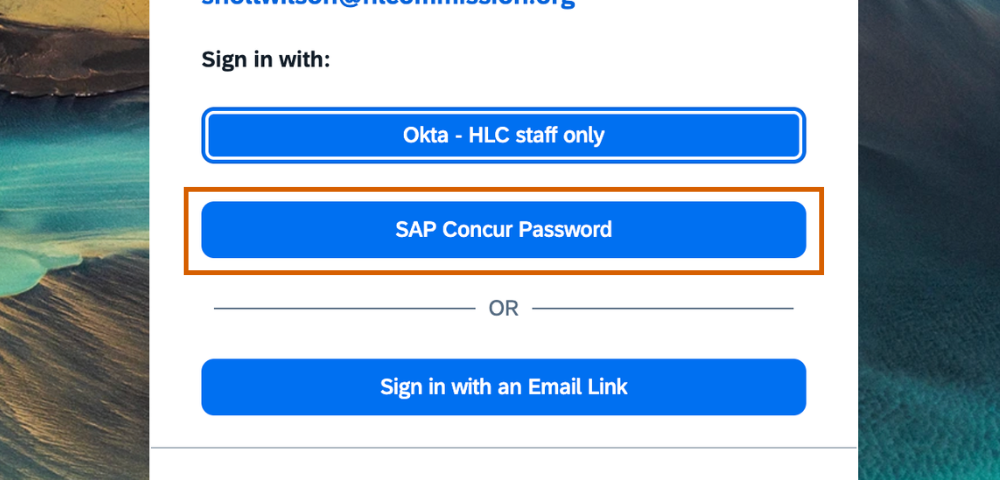
- Two ways to log in:
Sign in with Email Link – preferred method if you do not have an authenticator app.- Go to https://www.concursolutions.com/
- Enter the username
- Click Next
- You will see an option to Sign in with an Email Link

- If you click Sign in with an Email Link, a sign-in link is sent to your preferred email address. The link expires in one hour.

- Log in with SAP Concur Password.
- You will be prompted to reset your password the first time you log in. The password reset link will go to your preferred email.
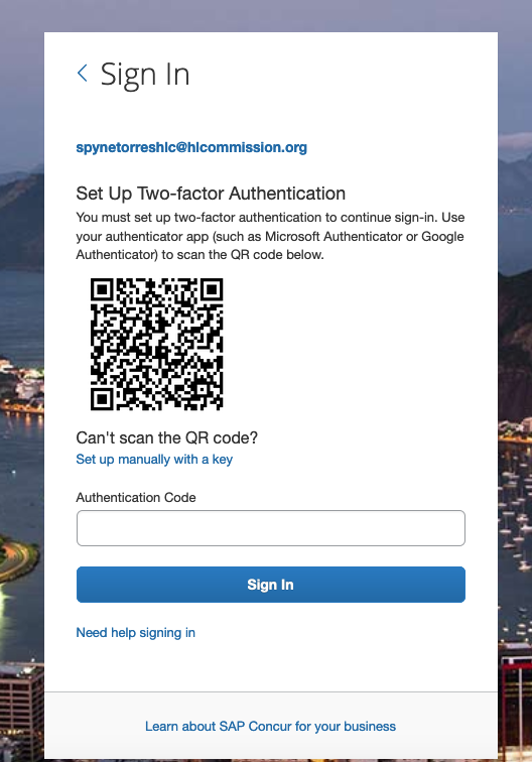
- Set up two-factor authentication using an authenticator app.
- While HLC cannot support specific authenticator apps, we encourage you to explore Concur’s resources on two-factor authentication and consult your institution’s IT department if you have questions. Several vendors, including Microsoft, Salesforce and Google have developed free authenticator apps.
- While HLC cannot support specific authenticator apps, we encourage you to explore Concur’s resources on two-factor authentication and consult your institution’s IT department if you have questions. Several vendors, including Microsoft, Salesforce and Google have developed free authenticator apps.
Setting Up Your Profile and Bank Information
- Verify your email.
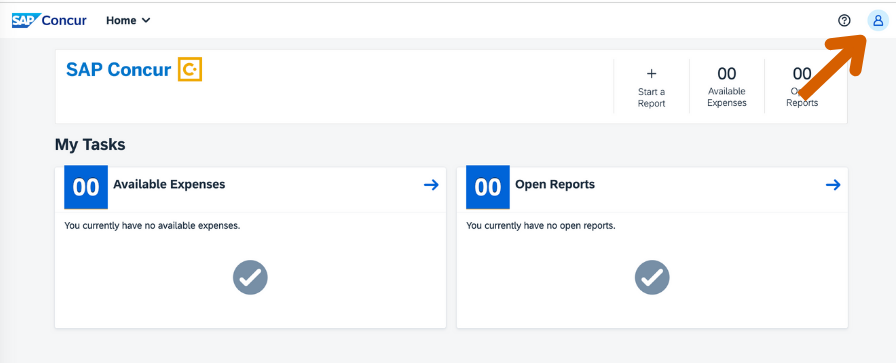
- Select Profile. (top right corner)
- Select Profile Settings.
- Within the Your Information menu (left side), select Email Addresses.
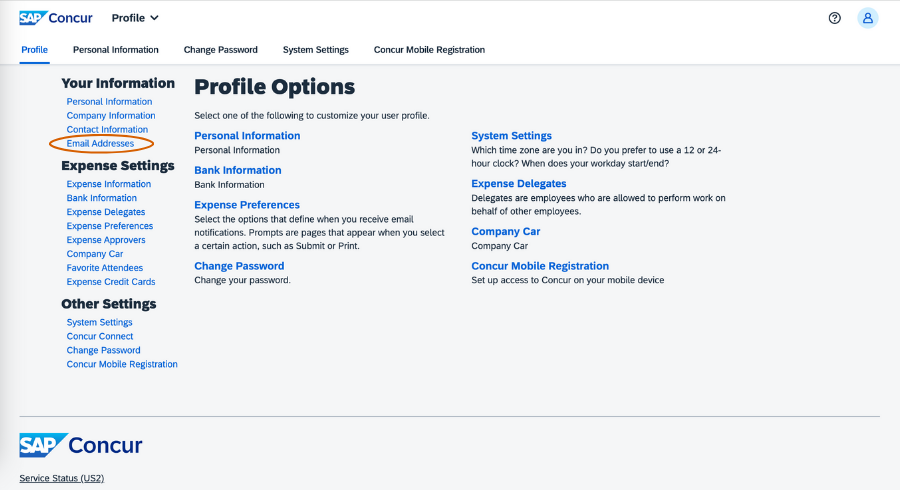
- The Preferred Email field has been pre-populated. Select Verify and an email will be sent to the email address listed to complete verification.
- Add any additional email addresses you would like to use to receive receipts and verify the address.
- Select Profile. (top right corner)
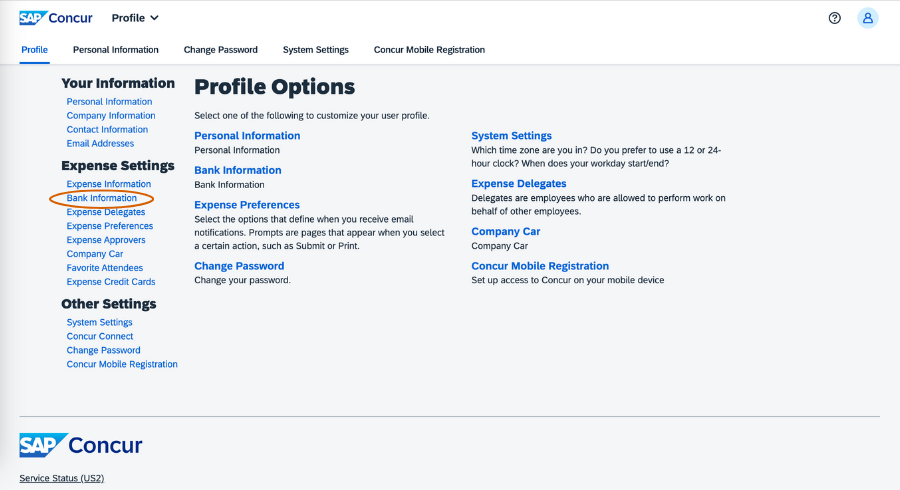
- Set up your bank account information.
Note: All reimbursements will be made directly to your bank account for expedited payment. For the first reimbursement through SAP Concur, please allow up to four business days for your bank information to be verified. If you do not prefer direct deposit, please continue to complete the Travel Expense Reimbursement Form. SAP Concur Expense will only accept direct deposit as its form of reimbursement.- Under the Expense Settings menu, select Bank Information.
- Enter all bank information in the fields provided.
- Check the box providing authorization of the use requirements.
- Select Save.
- Under the Expense Settings menu, select Bank Information.
Creating an Expense Report
- From the Concur home page, select Start a Report (plus sign in the top horizontal menu).

- Complete all required fields, which are indicated by a red asterisk.

- Report Name: Enter the type of visit or decision-making meeting you attended, followed by the date it occurred (MM/DD/YY).
- Business Purpose (optional): Enter the type of visit or decision-making meeting you attended and the institution.
- Department:
102: Accreditation visits (default)
204: IAC meetings
402: Board meetings - Institution name: use the search function to locate the institution that the expense report is related to (if applicable).
- Select Create Report.
- To add receipts and expense that are already saved within the receipt library to a report, select all receipts needed for the expense report in your library and select New Report. See capturing receipts.
- Concur will automatically create an expense report from your receipts; review this page to ensure accuracy.
- To add mileage to expense report:
- Select New Expense.
- From the Transportation menu on the right, select Personal Car Mileage.
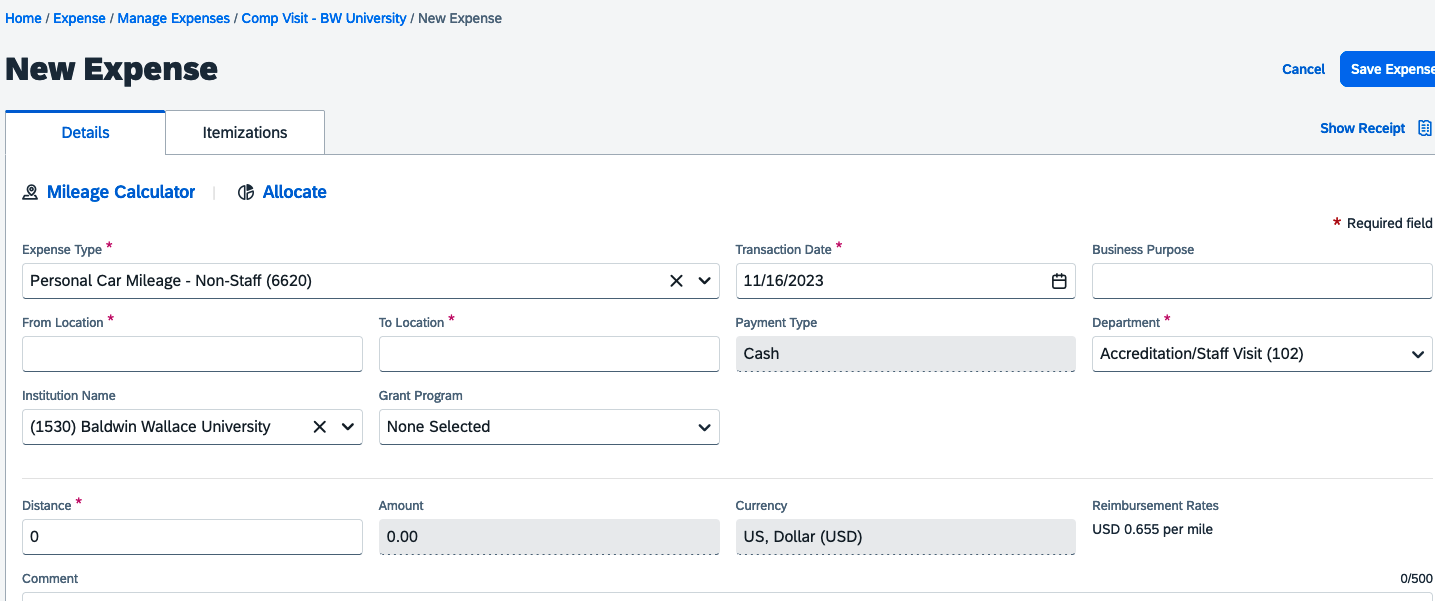
- Add date and To and From location.
- Select Mileage Calculator.
- Make any adjustments if applicable and click Add Mileage to Expense.

- Your report is automatically saved and will appear in your dashboard if you need to finish it later.
- When you are ready to submit your expense report, select Submit Report.
Capturing Receipts
There are three methods for capturing receipts within Concur:
Take Photos of Receipts With SAP Concur Expense App
Best for printed receipts for meals, taxis, etc.
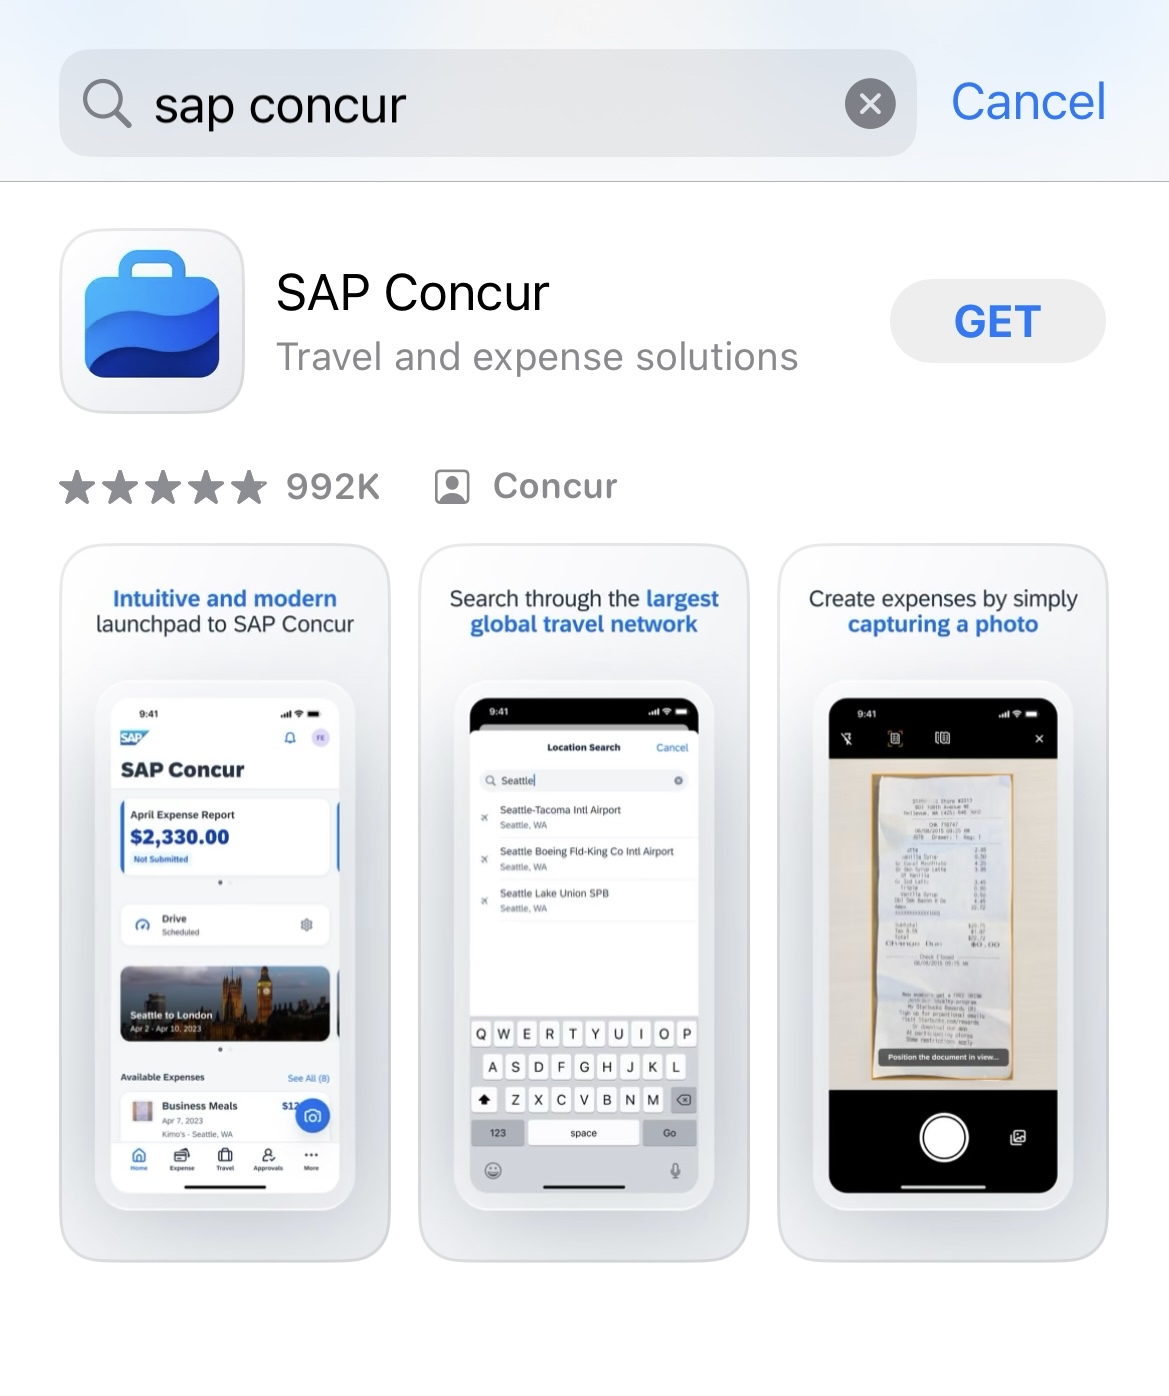
- Download the SAP Concur Expense app to your tablet or mobile device.
- Select the camera icon from the bottom menu.
- Indicate at the top if you will be capturing multiple images. This is useful for meal expenses when capturing the detailed receipt and the credit card receipt that includes gratuity.
- Align your receipt to capture the image.
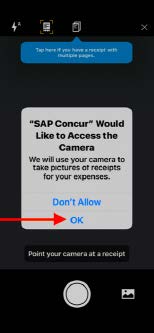
- Select Capture for each receipt and verify the dollar amount is correct.
- Select Next Receipt if you have more receipts to capture, or select Done.
Scan and Upload Receipts to SAP Concur Website
- Scan any receipts to be reimbursed to your computer.
- Select the Expense tab in the top menu of the SAP Concur website.
- Under the Available Receipts section, select Upload New Receipt, and select the file containing the scanned receipt you wish to upload.
- Attach the receipt at the report level, if applicable, using the same process within the Reports section.
- Attach the receipt at the expense entry level, if applicable.
Email Receipts to SAP Concur
Note: To email receipts to SAP Concur, you must complete the email verification step.
- From your verified email account, simply forward receipts as email attachments to [email protected]. Submitting receipts through email is useful for any receipts you may receive via email like Uber, hotel folios and airline tickets. These receipts will appear in your Available Receipts library.
Adding an Expense Delegate
You can add an expense delegate, such as an administrative assistant, to submit a report on your behalf. Please contact [email protected] to add your delegate if they are not on Concur.
Note: Please refer to the Standards of Conduct for peer reviewers for HLC’s policy on confidentiality regarding reviewer activities.
- From the home page, select Profile, Profile Settings.
- Select Expense Delegates.

- On the Expense Delegates page, click Add. The search area appears.
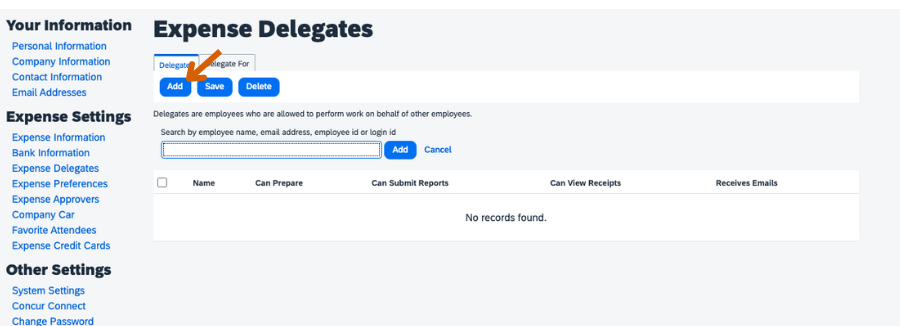
- Type at least the first three letters of the search criteria (delegate’s name, email address, etc.)
- When the desired person appears, click the name. Please contact [email protected] to add your delegate if they are not on Concur.
- Select the desired delegate options:
- Can Prepare: delegate can create expense reports and requests (if using Concur Request) on your behalf.
- Can Submit Reports: delegate can submit expense reports and cash advances on your behalf. Note: If you do not allow the delegate to submit, you receive an email notification when the delegate has completed the expense report and it is ready for submission.
- Can View Receipts: delegate can view receipt images on your behalf.
- Receives Emails: delegate receives a copy of each Expense-related email that you receive, except for approval emails.
- Can Approve: delegate can approve expense reports, cash advances, and requests (if using Concur Request) on your behalf, without date constraints.
- Receives Approval Emails: delegate receives a copy of each Expense-approval-related email that you receive. Note: The delegate cannot approve or reject the expense report via email.
- Click Save.

Related Resources
